How are custom annotations created?
Objective
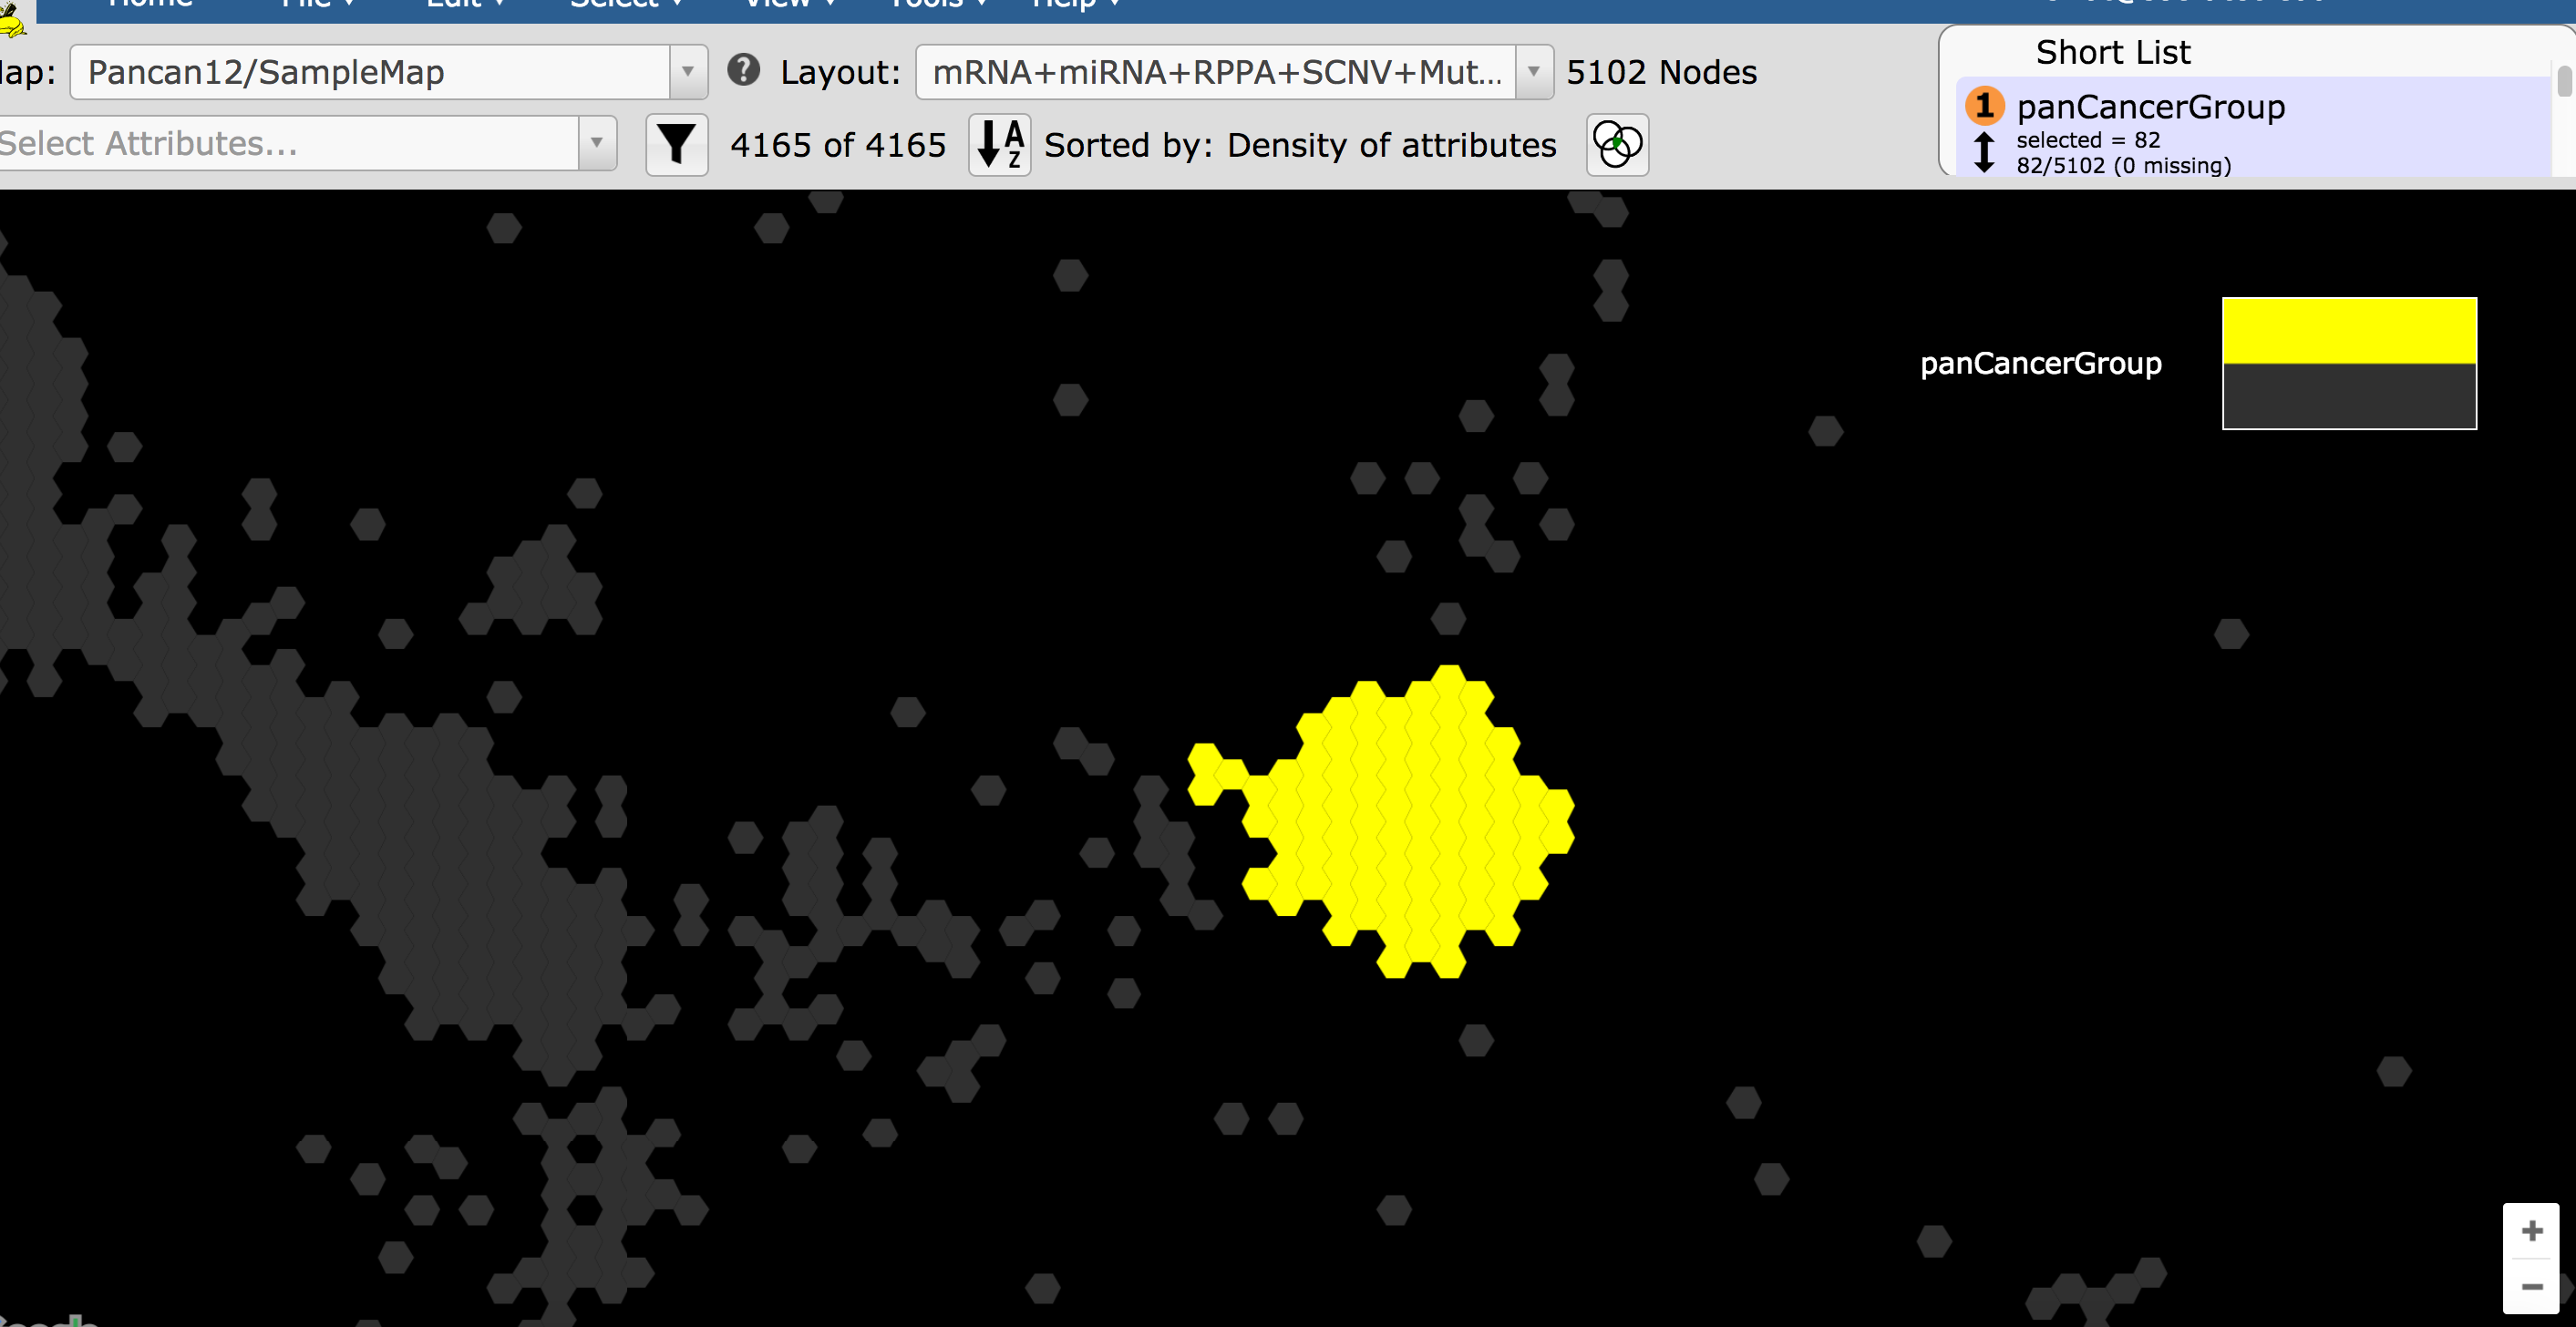
Make a group from a set of samples of interest.
Skills Covered
- Selecting a new data type to view as a new layout.
- Create a new group from a user-drawn region encompassing a set of samples.
Steps
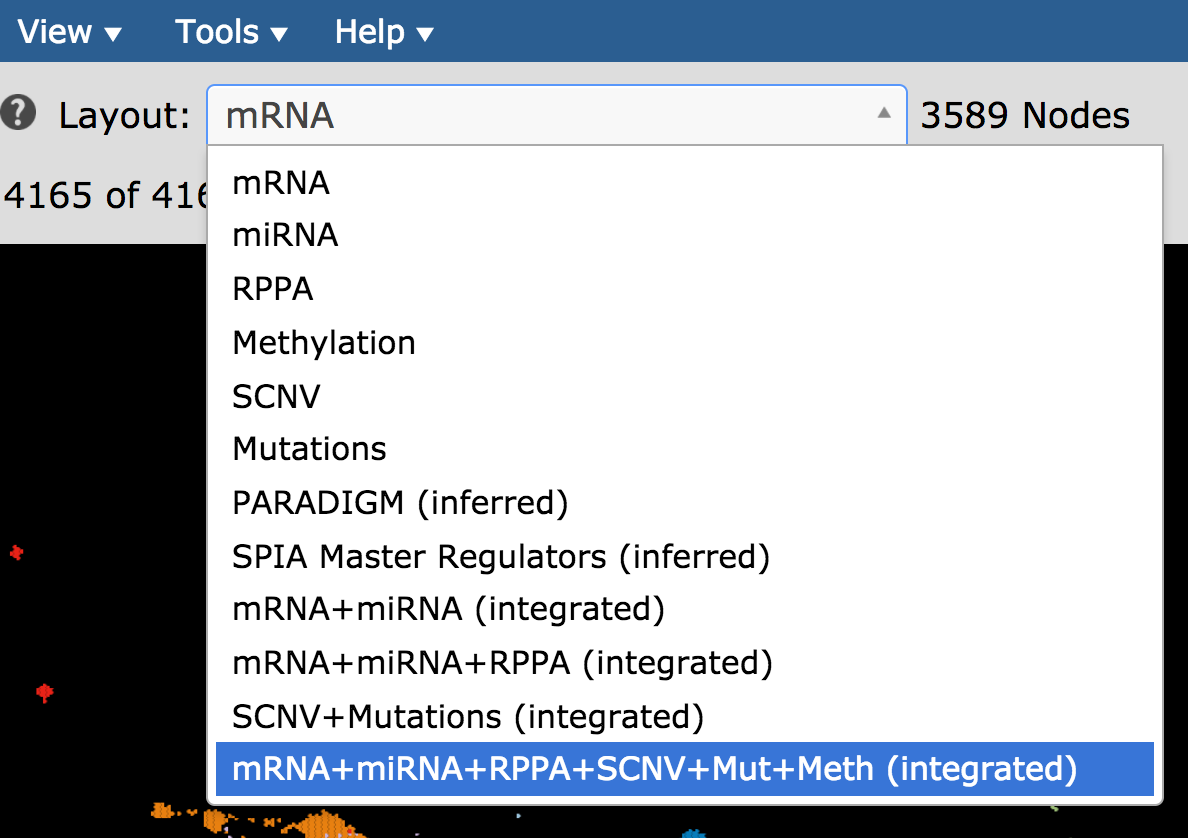
- With the map, Pancan12/SampleMap, select the layout, mRNA+miRNA+RPPA+SCNV+Mut+Meth (integrated) as in the picture below.
- In the Short List, make sure Tissue is checked and no other attributes are checked.
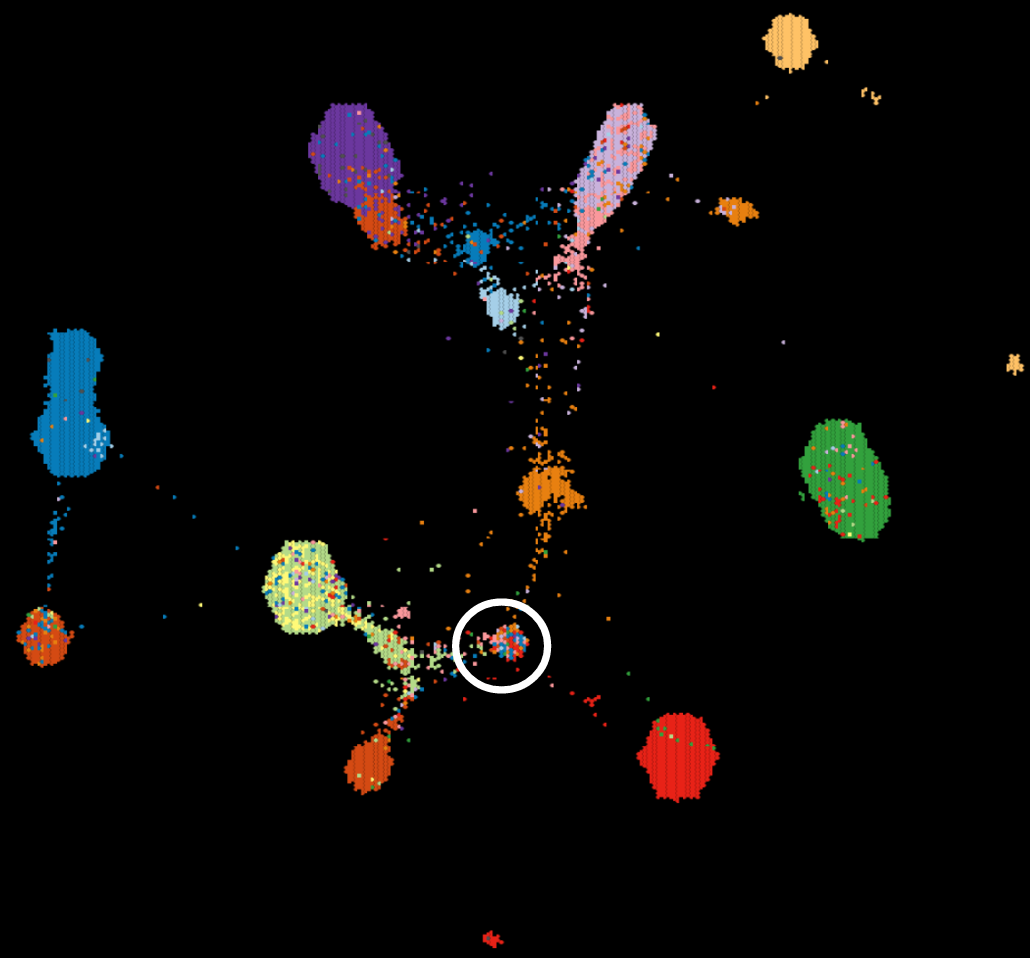
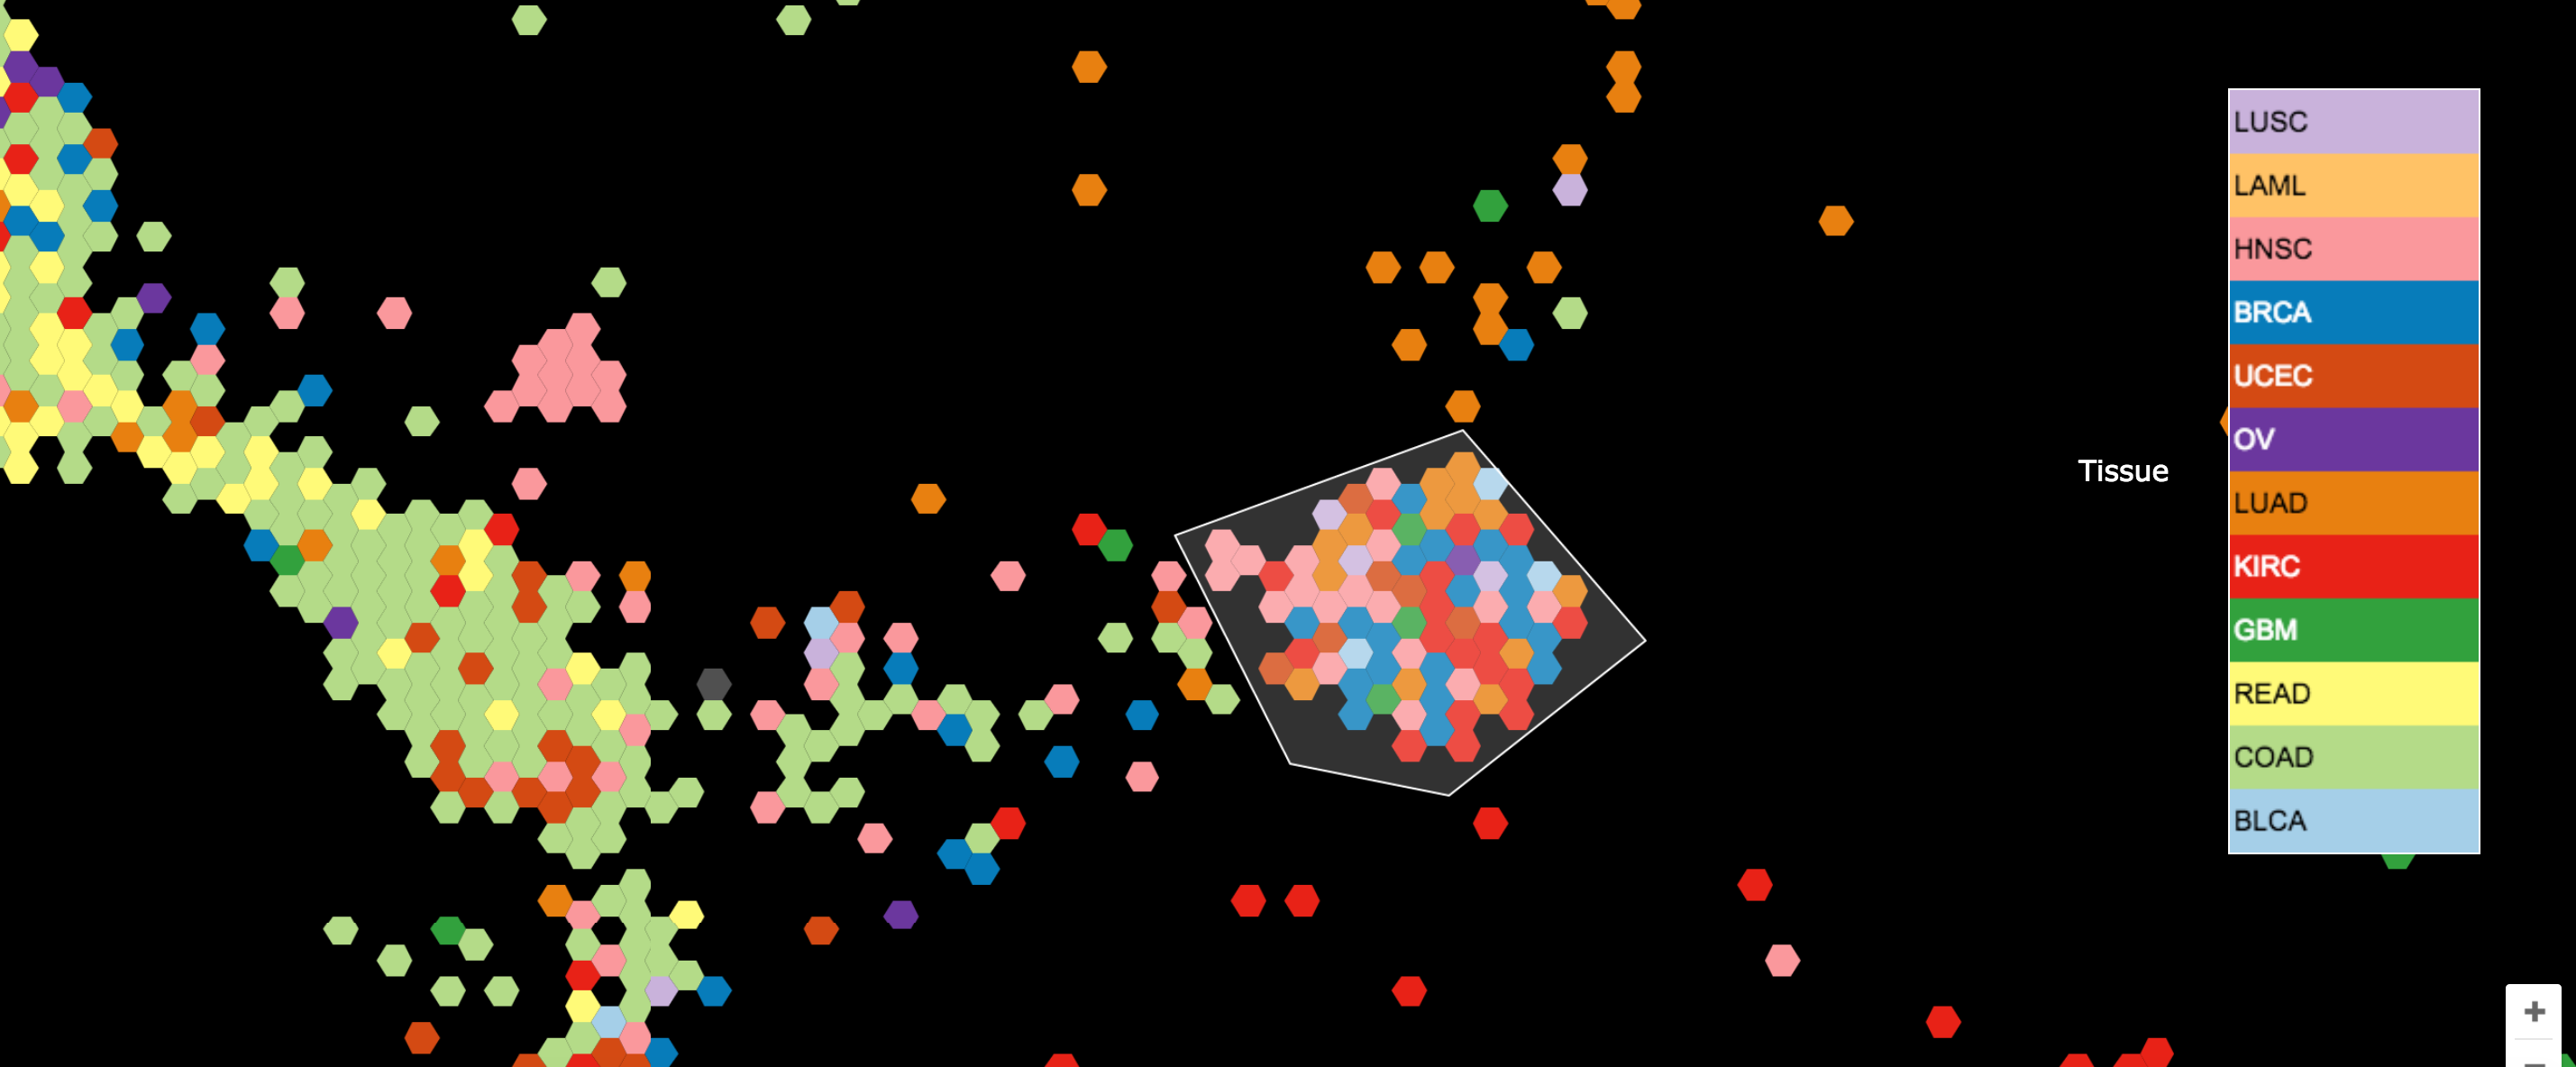
- In the middle of the map you can find a cluster of samples of mixed tissue of origin, as in the picture below. This is our pan-cancer group of interest.
- Use the zoom control in the bottom right of the map to zoom into the region containing the pan-cancer group.

- Click on the Select menu then click on by Polygon.
- Select the samples belonging to the pan-cancer group by clicking to define each vertex of the polygon. Double-click to complete the polygon.
- Specify the name of the group (e.g. PancancerGroup) in the popup window.
- Notice that this group is now selected and the new annotation/attribute shows up in the Short List with a lavender background indicating it is a generated attribute.