Which samples share a particular genomic alteration?
Objective
View all of the samples that share a particular genomic alteration of interest (e.g. TP53 mutation).
Skills Covered
- Familiarity with the attribute drop down list
- Familiarity with using the Short List of user selected/defined attributes.
- Set Operation to create a new attribute derived from existing attributes.
- Exporting a list of sample identifiers into a downloadable file.
Steps
- Get started with selecting samples on a TumorMap. The TumorMap UI provides users with a Select Attributes drop down that contains full list of sample annotations and attributes (long list) from which to choose attributes of interest, and a Short List that allows users more fine-tuned control of map operations.
- In this tutorial we will go through how to select attributes of interest, and then perform an intersection set operation to create a new custom attribute. Let’s say we are interested in viewing breast cancer samples that also have TP53 mutations, and then downloading a list of their sample IDs.

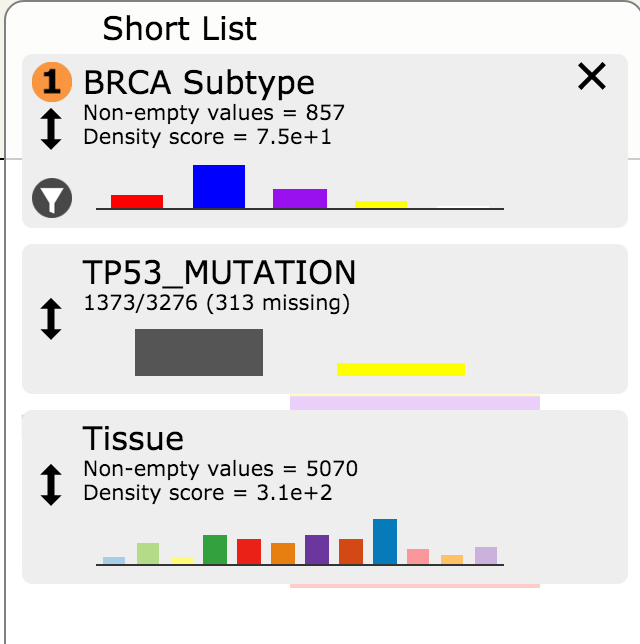
- In the Select Attributes drop down select Tissue and TP53_MUTATION attributes by typing in the beginning of the attribute name and clicking on the appropriate option in the list. This will copy the Tissue and TP53_MUTATION attributes from the long to the Short List
- NOTE: The tissue attribute might already be in the Short List as the default.
- In Select Attributes select BRCA Subtype by typing in the beginning of the attribute name and clicking on the appropriate selection in the list.
- Click on the Set Operation button. Its placement is shown in the graphic at the top of this page.
- In the popup window select Intersection for the desired set operation and select TP53_MUTATION as the first attribute and Tissue as the second attribute. Next to TP53_MUTATION click on the value drop down and click on 1. Next to Tissue select the value BRCA; click on the Compute Set Operation button.
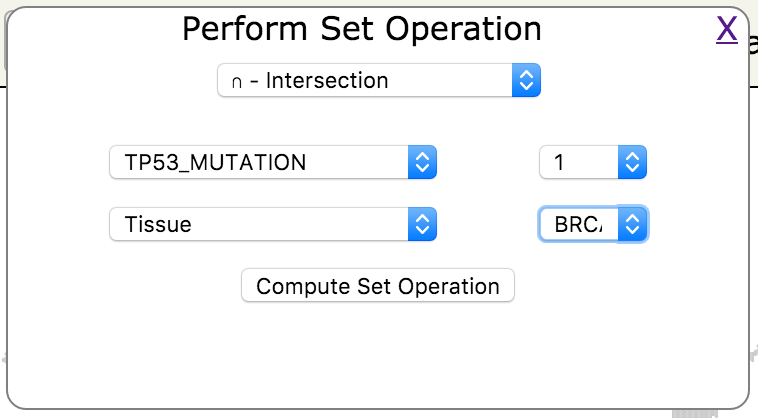
- Enter the desired name of this new custom group of samples (e.g. TP53_BRCA)
- Observe that the new group appears as a custom attribute in the Short List
- In the Short List, if TP53_BRCA does not have a
 , click on the
  to select it for color display
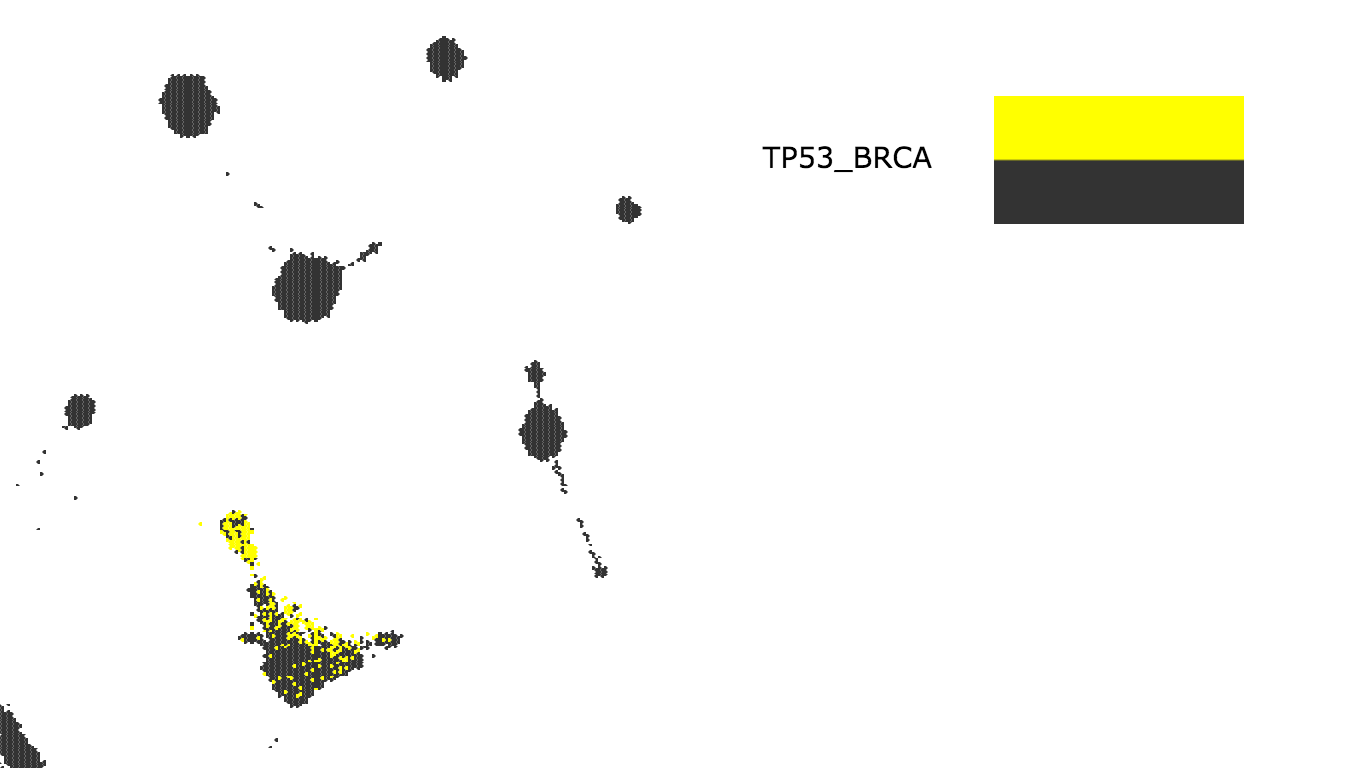
- Observe that the TP53 BRCA mutants are highlighted in the map
- Go to the File menu, then Download and click on Node IDs
- In the popup window make sure that TP53_BRCA is selected
- Save this group to a local file using the browser’s file download functionality
NOTE: You can just copy the sample IDs to the local computer memory by clicking into the box that contains the IDs to highlight them and then right-click and select Copy